

Shellinabox (Shell In A Box) is a web-based terminal emulator that allows you to access a shell (command line interface) via a web browser. It creates a web server that serves a terminal emulator to your browser, enabling remote command line access to your server. This is particularly useful for managing servers or performing administrative tasks without needing a dedicated SSH client.
Key Features
- Web-based Access: Provides terminal access through a web browser.
- Easy Setup: Simple to install and configure.
- SSL/TLS Support: Can be configured to use HTTPS for secure connections.
- Customization: Supports various customization options for appearance and behavior.
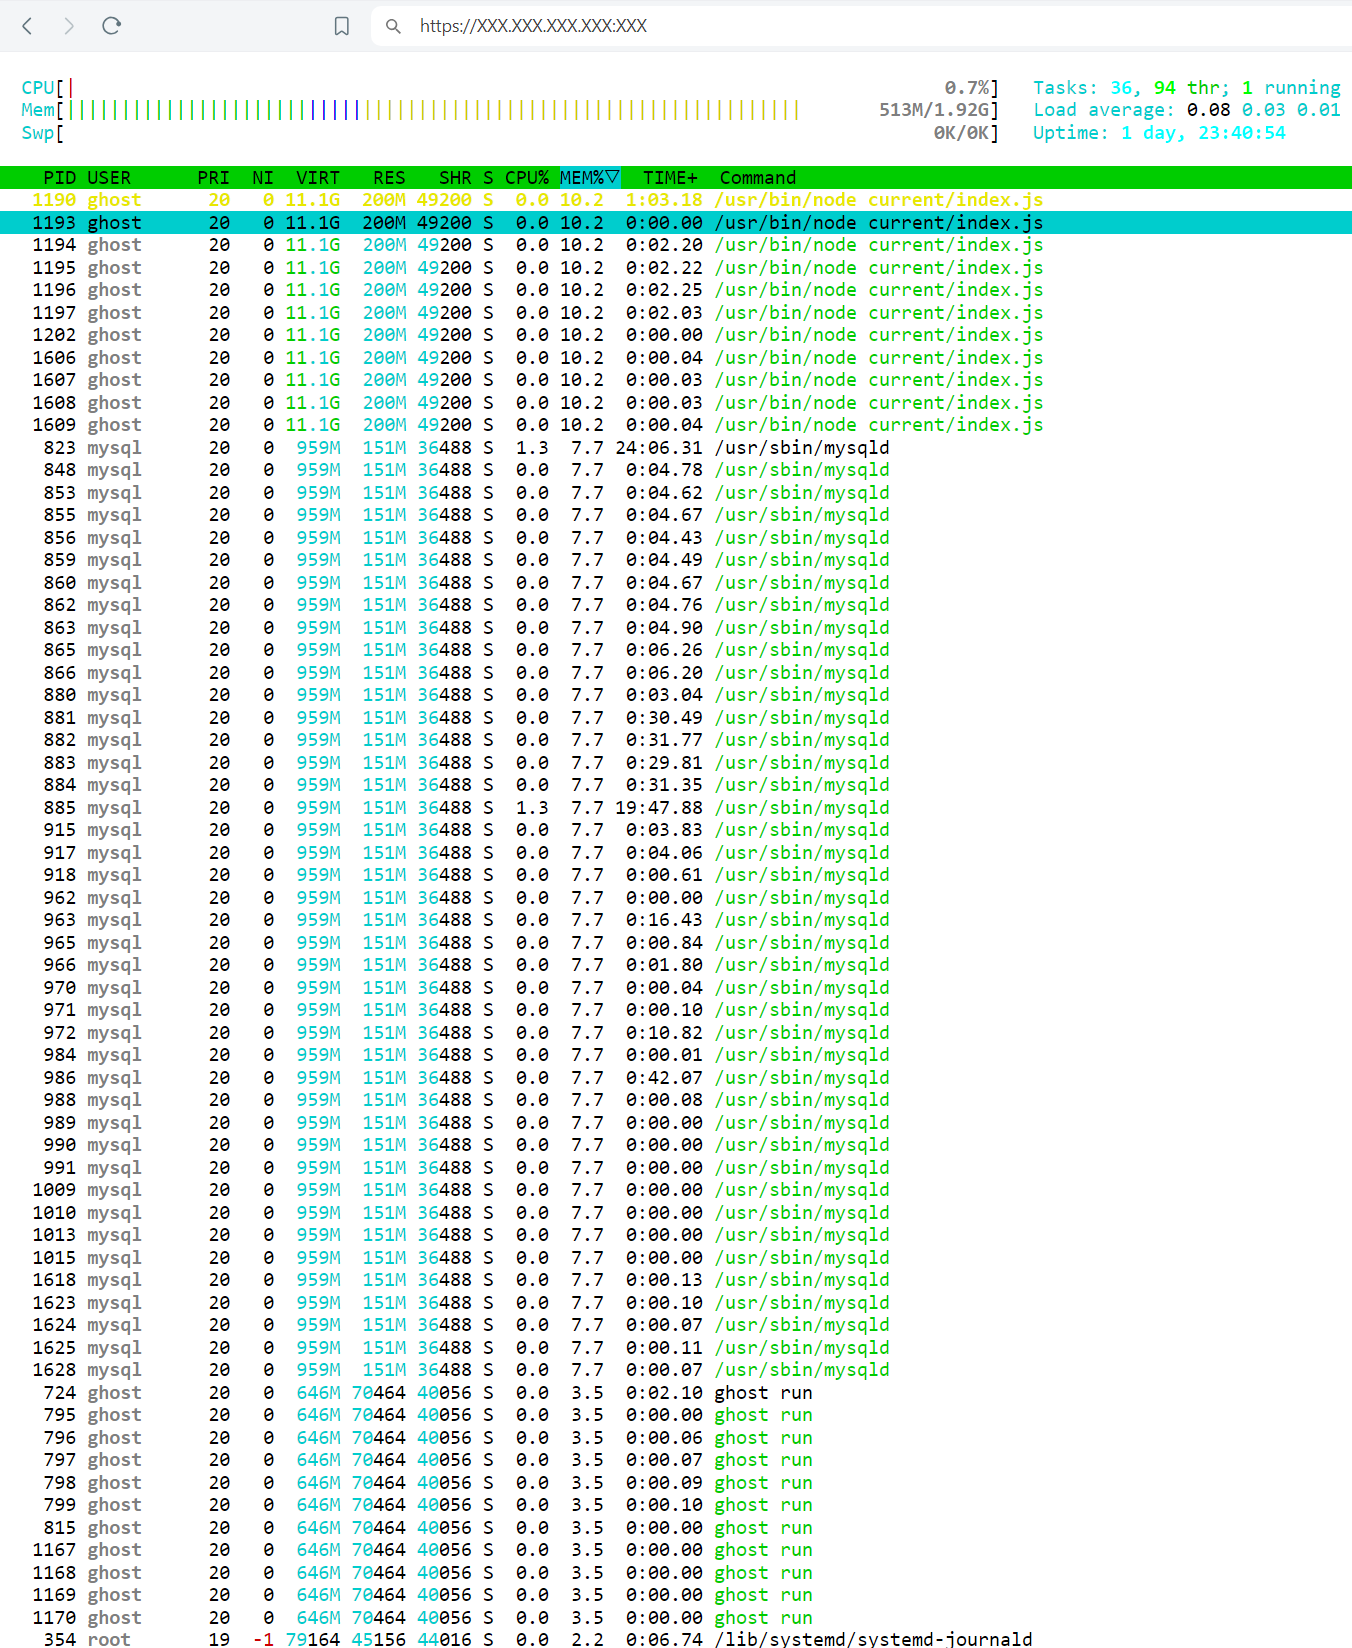
The need arose because we regularly use htop to monitor the running processes on our servers. An article was previously written to explain why and how Linux uses memory. It is not always convenient to connect to the terminal to access commands, so we wanted something more common and easy to use.
Installation on Ubuntu
- Update your package list:
- Install Shellinabox:
- Start the Shellinabox service:
- Enable Shellinabox to start on boot:
Access the Web Terminal:
Open a web browser and navigate to http://your_server_ip:4200. You should see a login prompt similar to what you would see if you were accessing your server via SSH.

Configuration
The default configuration file is located at /etc/default/shellinabox. You can edit this file to customize various options such as port number, user, and group permissions, and SSL settings.
For example, to change the port Shellinabox listens on, you would modify the SHELLINABOX_PORT line in the configuration file.
SHELLINABOX_PORT=8080
After making changes, restart the Shellinabox service to apply the new configuration.
Security Considerations
- SSL/TLS: By default, Shellinabox does not use SSL/TLS. To enable it, you need to configure SSL certificates. You can use self-signed certificates or obtain a certificate from a trusted Certificate Authority (CA).To generate a self-signed certificate:
- Firewall: Ensure that the port used by Shellinabox is allowed through the firewall.
- User Permissions: Limit access to trusted users and consider additional security layers like two-factor authentication (2FA).
Shellinabox is a convenient tool for remote server management and provides an alternative to traditional SSH clients, making it easier to access your server's terminal from anywhere with a web browser.
Tips & Must Have
Accessing Shellinabox with the root user is typically disabled for security reasons. Allowing root login directly can pose significant security risks, as it provides unrestricted access to the system. Instead, it is recommended to use a regular user account with sudo privileges to perform administrative tasks.
Enabling Root Login (Not Recommended)
If you understand the security implications and still wish to enable root login, you can modify the Shellinabox configuration. Here’s how you can do it:
- Edit Shellinabox Configuration:
Open the Shellinabox configuration file for editing:
- Allow Root Login:
Add the--no-beepargument to theSHELLINABOX_ARGSline to disable the bell, which is sometimes necessary for proper root access. You can also add--user=rootif necessary.
Save the file and exit the editor (Ctrl+X, then Y, then Enter).Restart
- Shellinabox:
Restart the Shellinabox service to apply the changes:
Recommended Approach: Using a Regular User with sudo Privileges
- Create a New User (if necessary):
If you don’t have a regular user withsudoprivileges, create one:
sudo usermod -aG sudo newuser
- Login with the Regular User:
Access Shellinabox using the new user credentials. - Use
sudofor Administrative Tasks:
Once logged in, you can execute commands withsudoto perform tasks that require root privileges:
Security Considerations
- Root Login Risks: Enabling root login increases the risk of unauthorized access. Always ensure you have strong passwords and, if possible, use other security measures such as fail2ban or two-factor authentication (2FA).
- Secure Connections: Ensure Shellinabox is configured to use HTTPS to encrypt your connection.
- Monitoring and Auditing: Regularly monitor and audit login attempts and system logs to detect any unauthorized access.
By following these steps, you can either enable root login for Shellinabox (not recommended) or use a regular user with sudo privileges (recommended) to access administrative functions securely.
When your browser indicates that the connection is not secure despite having SSL installed for Shellinabox, it is likely due to one of the following reasons:
- Self-Signed Certificate: If you are using a self-signed SSL certificate, most modern browsers will flag the connection as not fully secure because the certificate is not signed by a trusted Certificate Authority (CA).
- Mismatched Domain: The SSL certificate may not match the domain name you are accessing. For example, if the certificate is issued for
example.com, but you are accessing the server using its IP address or a different domain, the browser will show a warning. - Expired Certificate: The SSL certificate might have expired, which will cause browsers to consider the connection insecure.
- Incorrect Configuration: There might be issues in the Shellinabox configuration that prevent it from properly serving the SSL certificate.
Steps to Resolve the Issue
1. Check Certificate Validity and Configuration
Ensure that your SSL certificate is valid and correctly configured:
- Verify the expiration date of the certificate.
- Ensure the certificate is issued for the correct domain.
- Check the configuration file (
/etc/default/shellinabox) for any misconfigurations.
2. Using a Self-Signed Certificate
If you are using a self-signed certificate, consider obtaining a certificate from a trusted CA. For testing or internal use, you can proceed with the self-signed certificate but will need to manually trust the certificate in your browser.
To manually trust a self-signed certificate:
- Open the Shellinabox URL in your browser.
- Click on the "Not Secure" warning and view the certificate.
- Follow the prompts to add an exception and trust the certificate.
3. Obtaining a Trusted Certificate
For production use, it is recommended to use a trusted SSL certificate from a recognized CA. You can use services like Let's Encrypt to obtain a free, trusted SSL certificate.
Steps to Install Let's Encrypt SSL Certificate
- Install Certbot:
sudo apt install certbot
Generate the Certificate:
Use Certbot to generate and install the certificate. Replace your_domain with your actual domain.
Configure Shellinabox to Use the Certificate:
Edit the Shellinabox configuration file to use the newly obtained certificate.
Update the SHELLINABOX_ARGS to point to the Let's Encrypt certificate and key:
Save and exit the file (Ctrl+X, then Y, then Enter).
- Restart Shellinabox:
Accessing the Server Using the Correct Domain
Ensure that you are accessing Shellinabox using the domain name that matches the SSL certificate. For example, if the certificate is for your_domain, access Shellinabox via https://your_domain:4200.
By following these steps, you should be able to resolve the "connection not secure" warning and ensure that your Shellinabox connection is secure.
Member discussion