
Swap space is a chunk of place for storing memory that has been lay aside for the operating system to temporarily store data that it can no longer hold in RAM. That way, it allows anyone to increase the amount of data that your server can keep in its working memory, with some red flag. The swap storage on the hard disk will be used primarily when there is not enough room in the RAM to hold the data of the applications in use.
We recently wrote about creating and updating Ghost on Ubuntu 20.04 and send emails with MailGun your blog for free. Let's dig into swap space on Linux.
Prerequisite: Checking the system for swap information
First of all, we can check if the system already has some swap space available. It is possible to have several swap files or partitions but most of the time one should be enough.
To check if the system has any swap configuration on board, you can enter the following command:
If you do not receive a response after entering this command, it means that your system does not have any exchange space at that moment.
You can still verify that there is no active swap by using the free command as follows:
total used free shared buff/cache available
Mem: 1.9Gi 788Mi 142Mi 1.0Mi 1.0Gi 1.0Gi
Swap: 0B 0B 0B
As the information on the 'Swap' line on the screen indicates, no swap space is active in the system.

Step 1: Checking available space on the hard drive partition
Before creating our swap file, we will make sure of the current usage on the disk and thus take the necessary precautions regarding the available space. To do this, here is the command to enter in your terminal:
Filesystem Size Used Avail Use% Mounted on
/dev/vda1 25G 7.8G 17G 33% /
The device with / represents our disk. We have 17GB of space so there is no need to worry about that! We are using 7.8GB of data for the moment out of the 25GB available in total.
Although there is some debate about the percentage of allocation for the creation of an ideal swap file, it depends primarily on your personal use and preferences. Refer to your application usage more than anything else. However, an amount equal to or 2 times the size of the RAM on your server is a good benchmark.
Also, any amount larger than 4GB of swap is probably useless if you are using it as a backup for RAM.

Step 2 – Creating a Swap File
Enough chitchat, it's time to get down to business! Since we know how much space we have available on the disk, we can now create a swap file on our data system. We will allocate a file of any size we want and call it swapfile in the root (/) directory.
The best way to create a swap file is to use the fallocate command. This command instantly creates a file of the specified size.
In our case, the server has 2GB of RAM, so we will create a 2GB file as an example in this tutorial. Please adjust the command below according to your server settings:
We can check that the right amount of space has been reserved by typing:
-rw-r--r-- 1 root root 2.0G Oct 7 01:43 /swapfile
Our file has been created with success and the correct amount of space has been set aside. It is now time to jump to the next step and enable the Swap File.

Step 3 – Enabling the Swap File
Now that we have a file with the right size available, we need to turn it into swap space.
First of all, we need to confine the permissions of this file so that only users with root privileges can read its contents. This method is used to prevent users without privileges from being able to access the file, which would lead to a security breach in the system.
To make the file accessible to root users only, here is the command:
Check that the permissions have been changed with the following command:
-rw------- 1 root root 2.0G Oct 7 01:43 /swapfile
As you can certainly see, only the root user has the read and write flag. We can now mark the file as swap with the command below:
Setting up swapspace version 1, size = 2 GiB (2147479552 bytes)
no label, UUID=04ab9ad1-f72d-4ef6-bae3-3035d71b0647
After marking the file, we can enable the swap file, allowing our system to start using it:
Verify that the swap is available by typing:
NAME TYPE SIZE USED PRIO
/swapfile file 2G 0B -2
We can check the output of the free utility again to corroborate our findings:
total used free shared buff/cache available
Mem: 1.9Gi 791Mi 198Mi 1.0Mi 992Mi 1.0Gi
Swap: 2.0Gi 0B 2.0Gi
Our swap has been set up successfully and our operating system will begin to use it as necessary.

Step 4 – Making the Swap File Permanent
Our recent changes have enabled the swap file for the current session. However, if we reboot, the server will not retain the swap settings automatically. We can change this by adding the swap file to our /etc/fstab file.
Back up the /etc/fstab file in case anything goes wrong:
Add the swap file information to the end of your /etc/fstab file by typing:
Next we’ll review some settings we can update to tune our swap space.

Step 5 – Tuning your Swap Settings
There are a number of options you can configure that will impact the performance of your system when you need to manage swap.
Adjusting the Swappiness Property
The swappiness setting defines how often your system swaps data from RAM to the swap space. It is a value between 0 and 100 which stands for a percentage.
With these values close to null, the core will not swap data to the disk unless strictly necessitated. Be aware that interactions with the swap file are "expensive" in the sense that they take much larger amounts of time than interactions with RAM and can result in a significant reduction in performance. Determining that the system should not rely on the swap file will typically make your system quicker.
A value close to 100 will try to put some more data in the swap to liberate RAM storage. Based on the memory profile of your applications or the use you make of your server, this could be preferred in some instances.
We can visualize the present values of the permutation by entering :
In our case, the value is currently 60.
For a Desktop, a swappiness setting of 60 is not a bad value.
For a server, you might want to move it closer to 0.
We can set the swappiness to a different value by using the sysctl command.
For instance, to set the swappiness to 10, we could type:
The outcome will result as follow :
vm.swappiness = 10This setting will persist until the next reboot. We can set this value automatically at restart by adding the line to our /etc/sysctl.conf file:
At the bottom, you can add:
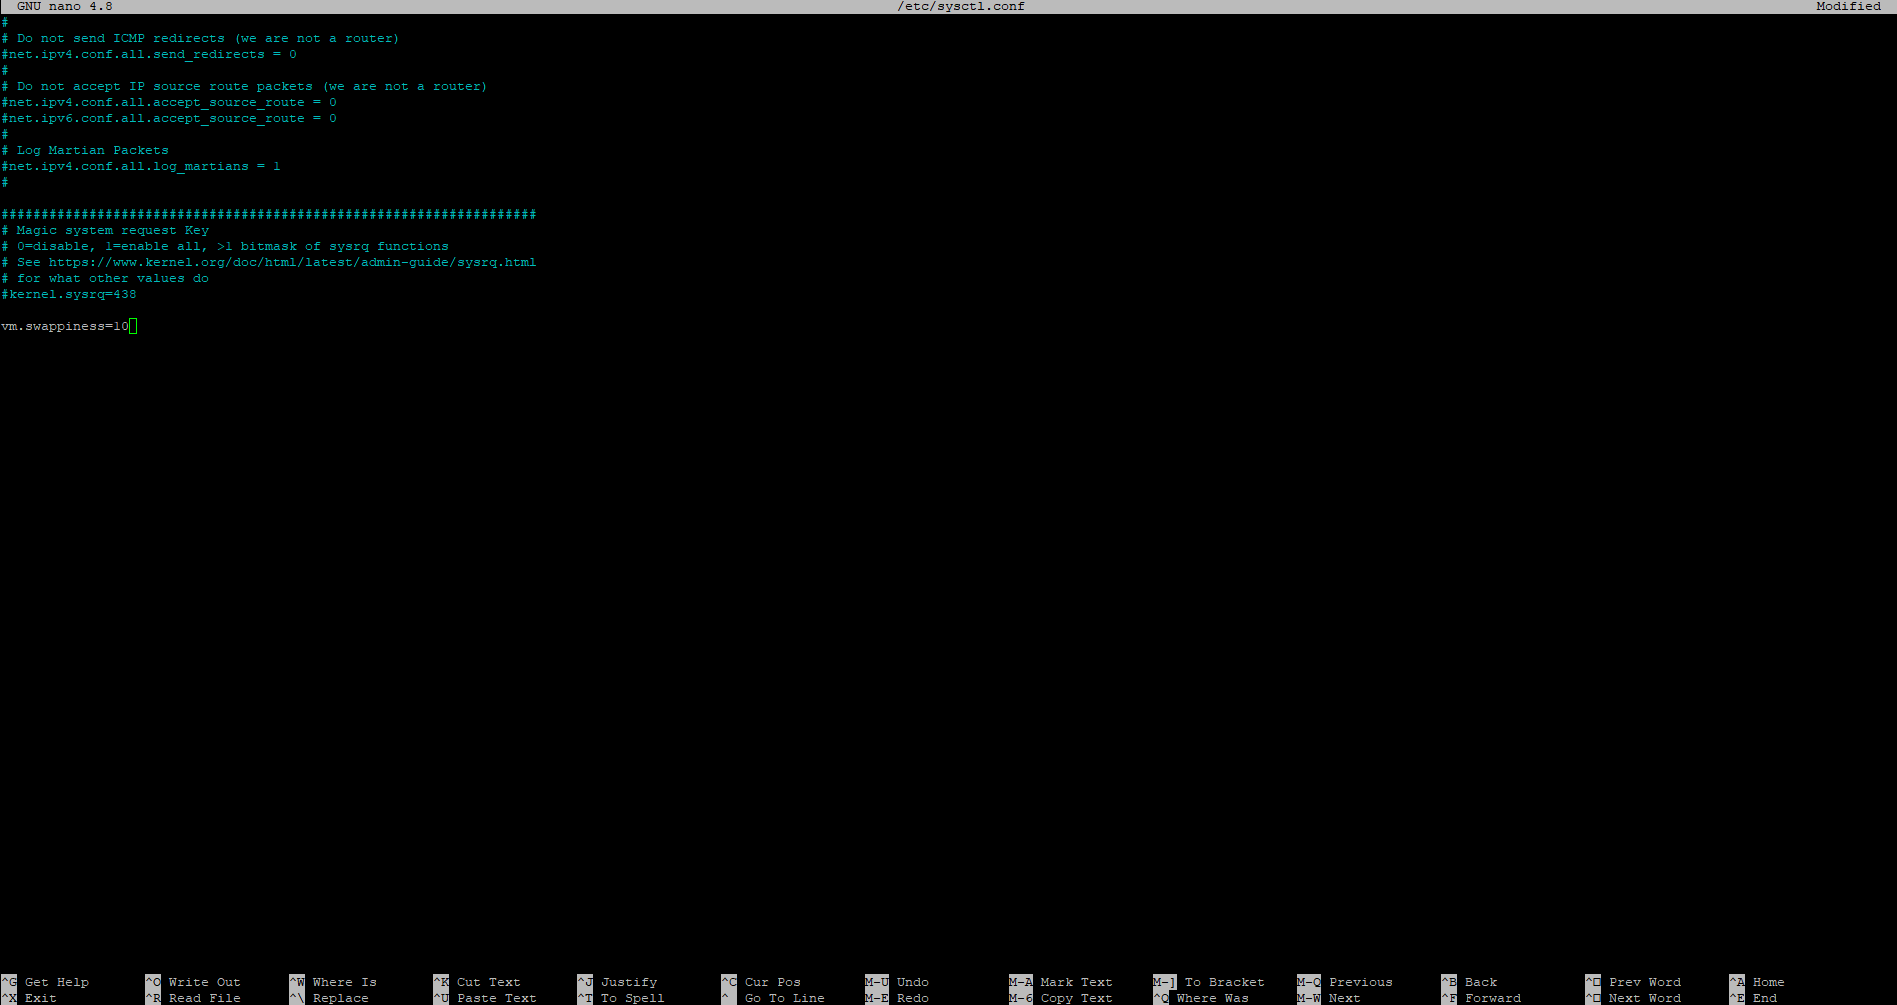
Save and close the file when you are finished.
Adjusting the Cache Pressure Setting
An additional related value that you may consider changing is the vfs_cache_pressure setting. This parameter shapes the extent to which the system chooses to store inode and dentry information as compared to other information.
This is essentially file system access data. This information is usually very valuable to look at and very heavily requested, so it's a very useful thing to cache for your system. You can see the current value by requerying the proc file system again:
Currently, the value is 100.
As it is currently configured, our system removes inode information from the cache too quickly. We can set this to a more conservative setting like 50 by typing:
The outcome after typing and entering this command should look like this:
Again, this is only valid for our current session. We can change that by adding it to our configuration file like we did with our swappiness setting:
At the bottom, add the line that specifies your new value:

Save and close the file when you are finished.
If you are experiencing OOM (out of memory) errors or if you find that your system is unable to use the applications you need, the best solution is to optimize your application configuration or to upgrade your server.